Working with a specific static site generator?
Customize CloudCannon's documentation to suit your SSG.
Great! We'll show you documentation relevant to .
You can change this any time using the dropdown in the navigation bar.
A fast, scalable DNS service automatically configured for your site.
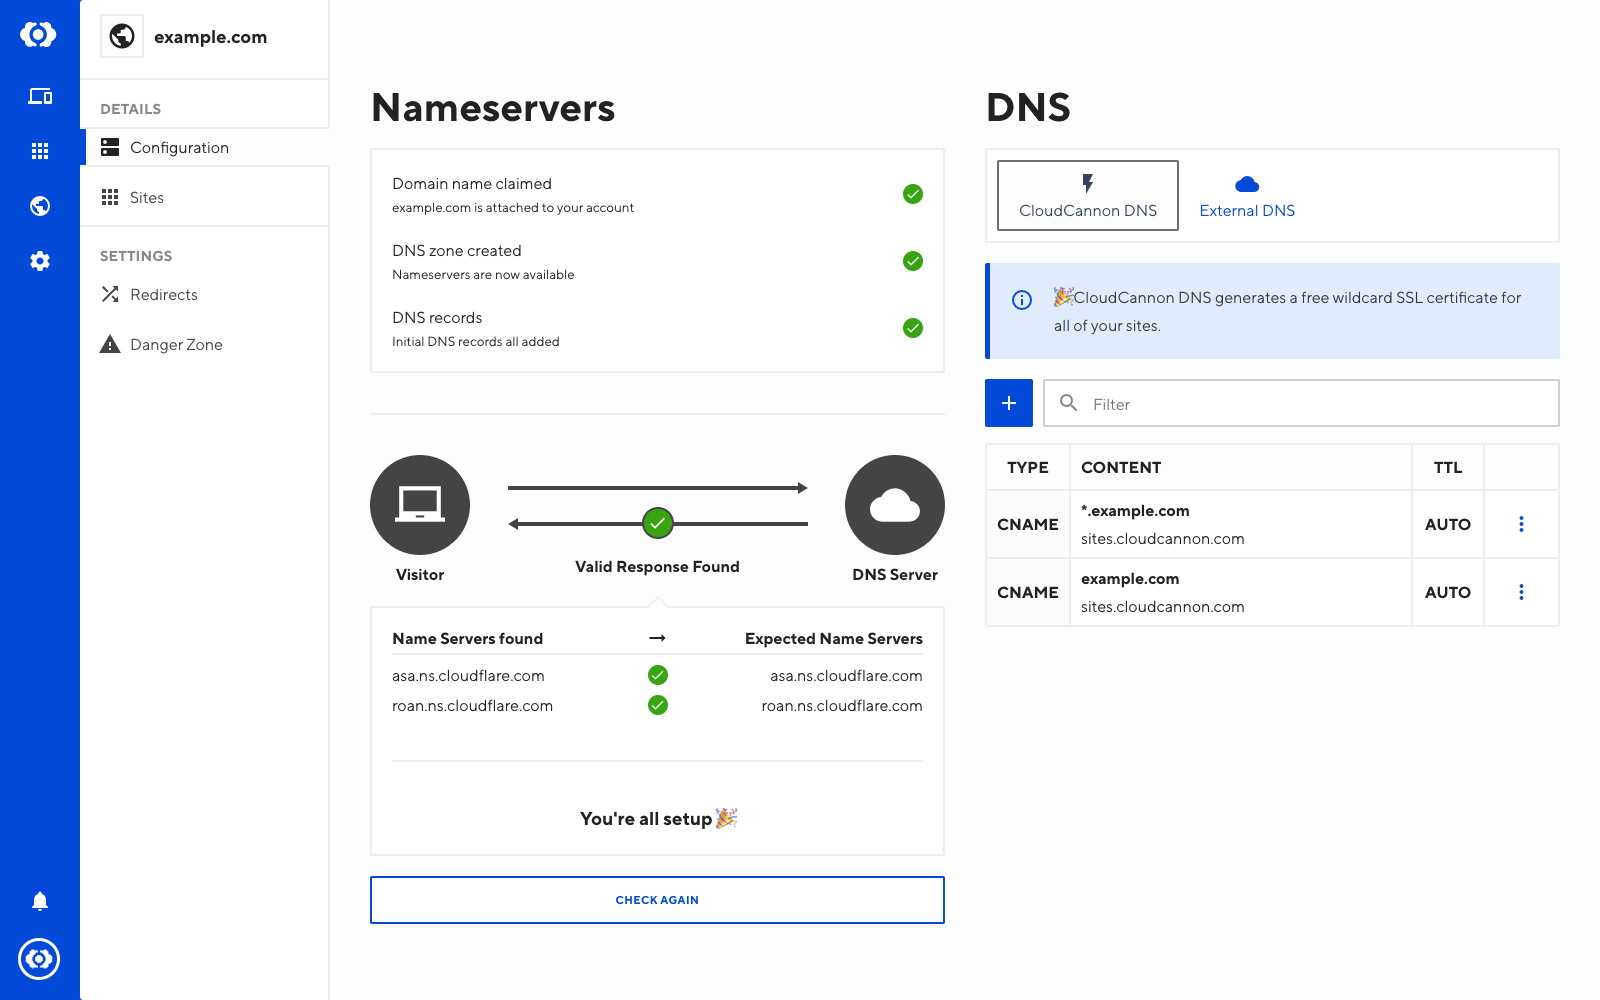
Using CloudCannon DNS allows you to manage your DNS records within CloudCannon, and provides a free wildcard SSL certificate for your domain.
Once you have added your domain name, follow these steps to start using CloudCannon DNS:
- Access the settings for your domain via the Domains button (globe icon) on the left sidebar.
- Select your domain, then open the Configuration tab.
- Ensure you are using CloudCannon DNS. Otherwise, click CloudCannon DNS and Switch to CloudCannon DNS.
Your DNS records will be updated.
The next step is to configure your name servers, which needs to be completed on your domain registrar.
- Find the list of Expected Name Servers in the settings for your domain.
- Go to your domain registrar’s settings for the domain, and add the Expected Name Servers provided by CloudCannon.
- Save the changes.
If you are not sure which domain registrar you are using, check with ICANN Lookup.
Managing Records#
Add external services or ownership validation through DNS records while your site is configured with CloudCannon DNS.
To change or add a new record:
- Go to the Domains section and select your domain
- Go to the DNS settings and change or add details for one or more records
- Click Update DNS